Friday, August 26, 2011

Kid Memo Boards

Peyton and Ella share a room. You knew that, right? It's a small room, but we make do. I try to separate the boy and girl stuff the best I can to give my kids their own space within such a tiny space.

See how Ella has her side of cubes and Peyton has his side of cubes? It looks okay, but I wanted it to fancy it up.


Their memo boards used to be in our basement playroom in Iowa. That was when we had space to spare. So much space that I made art boards for each of them just because I needed to fill up some wall. 


The pink and blue boards matched the color theme of their little kid playroom. But now that the boards are in their big kid shared room, they really a needed a make-over.


So I bought fabric in their favorite colors. Purple for Ella. Green for Peyton. How I love shopping for fabric! When I don't have the kids with me it is such a relaxing task!

I stripped both boards of their old fabric and ribbon and got to work. 

I painted the outside of Ella's frame:


And hot glued on the fabric. As I become more Craft Mature, I'm realizing that any good project is going to make me curse like a sailor at some point. 

The best framed cork boards are the ones where you can take off the frame, pull the fabric around to the backside, staple it on, and then reattach the frame. The fabric is nice and tight and evenly attached. This is not that kind of board. 

So my fabric is cut perfectly and I've even folded it over and ironed the edges to make it extra perfect. But as I start at one side and glue and flatten and straighten, the fabric stretches and moves around and then I have extra fabric in the corners of the other side and I don't know how to fix it. And cutting fabric that is mostly glued down is a disaster. And I don't want to cut too much, because then the fabric pattern will be all wonky and uneven. I vividly remember this exact thing happening last time I made the boards. It's a frustrating mess. I know you can't tell from the pictures, but believe me! Hot messes are running rampant around here.

But that's what embellishments are for, right? To cover up hot messes. I was planning on embellishing the boards anyway. Really! I WAS! Dang! 


I glued on matching ribbon:


I did the same for Peyton's:


I had originally planned on embellishing Ella's board with a bunch of purple silk hydrangeas. But, really, the whole thing needed a big pop of color, so I learned some new tricks and went for it. 

I bought a quarter yard each of some pretty fabrics, a handful of pearly and sparkly buttons, and some fabric glue. I got out my hot glue gun and scissors. I sat down on the couch and for two nights in a row I made flowers while I watched TV. 

Ella loved the flowers so much that she asked if I could make an extra of each one as a hair clip for her. So of course I did! 

It took a little time, but I found some great tutorials and I learned how to make rolled fabric flowers and petal pusher flowers. Once I got the hang of the techniques, they were pretty simple to make. After I had a whole bunch of them, as well as some silk-type flowers I had on hand, I started arranging and hot gluing them to Ella's board.


My kids LOVE watching me make stuff for them. I think it makes them feel extra special when I create things just for them. As I was arranging the flowers, Peyton and Ella walked into the room and they were both so excited - "Whoa! It's so pretty!" "That's so coooool!" 
It's one of the nicest sounds in the world.


Peyton's board needed some embellishing, too. I wanted to hot glue on some of his small toy jets, but he wasn't willing to give them up for decoration's sake. I don't blame him. 

He has a zillion army men, so I talked him into letting me have some for his board. Most of his army men are green and tan, which would match the green and blue hounds tooth pattern really nicely. But I wanted some extra color on his board, too. So I took the army men outside on gave them a few coats of spray paint. Here they are, about to meet their maker - their color maker. mwahahaaaaa.


They turned out really cool looking! Peyton liked the red army men so much that he asked me to paint extras for him to play with. So of course I did!

Since the army men have flat bases, I just hot glued them along the bottom of the board. Peyton helped me with the arranging. He has an eye for this sort of thing and he loves making patterns.


I was able to grab a couple of his red jets and attach them with push pins. I like the look of them, and Peyton is happy because he can take them off to play with if he wants.


I like that it's embellished, but in pure boy style.
And I think the boards look really neat next to each other.


I also bought some new pushpins to match the boards. Ella made hers into a happy face. With hair!


Peyton made his into bombs. And he added an extra jet and a race car patch.

I bought a bunch of extra fabric so that I could personalize their storage cubes a little more.

Because this is really 3 vertical sets of cubes that aren't attached to each other, it was easiest just to nail the fabric to the wall behind them. Easiest being a relative term. It was still a huge pain to line up the fabric with the cubes. There was a lot of pulling the cubes away, nailing fabric, moving the cubes back, quiet cursing, pulling the cubes away, removing nails, dropping nails, nailing fabric again, moving the cubes back, deep breathing and walking away. If the cubes were attached to each other it would have saved me a whole lot of under-my-breath-cursing.

But I REALLY love how it all turned out.


And Peyton and Ella are taking a little more pride in keeping their sides tidy, so it was all worth it.

Thursday, August 18, 2011

Guess Where We Went!

James planned a little mini-vacation for us on the sly! Sweet, sweet, sneaky husband! We were only there for 3 days but we had soooo much fun!

See how many clues it takes you to figure out were we went! 


Clue #1

We stayed in our home state of California, but we flew on an airplane. This was Peyton and Ella's first plane ride, so it was a super big deal!


On our plane ride we saw typical plane stuff:


And The Simpsons:


And a storm a-brewin':


Pretty cool, right?


Clue #2

Our hotel room had this view (hmmm...is that an island back there?):


Clue #3

We took a tour of a submarine:


I'll tell you, every single time Peyton came home from the school library last year, he either had a book about skateboarding or some sort of warfare - aircraft carriers, battleships, tanks - you name it. So seeing the inside of a REAL SUBMARINE was really cool!


Clue #4

We walked down a really, really curvy street!


Clue #5

We went to the best smelling bakery in all the land - Boudin Bakery: 


And we ate in their restaurant. And had clam chowder. In a sourdough bread bowl.


Clue #6

We went to an Aquarium where we got to see all sorts of sea life, like Sharks and Sea Stars and Sea Nettles:


And why the H E double hockey sticks does a sting ray need to look like this? It's just creepy!


The Aquarium also had some really useful information in their women's restroom:


Clue #7

We went to a Fisherman's Wharf where there were lots of sidewalk food stands:


And we had dinner at Nick's. Lobster bisque. In a sourdough bread bowl.


Clue #8

We saw A LOT of sea lions! 


I love this guy:


You know what? Sea lions are SUPER STINKY.


Clue #9

We took a bay cruise and saw this island close up:


And this bridge:


Did you figure it out yet?

Here's the final clue!

Clue #10


We spent $15!!! 

(On this souvenir picture. Totally worth the money because I love this picture!)


How many clues did it take you? :)


Wednesday, August 10, 2011

3 Things

1.  My Blog Got a Make Over

Did you notice? Viva la Violette created it for me. She's so wonderful and now my blog is so pretty! (I won the makeover in a giveaway. Because as much as I adore fancy blogs, I'm WAAAAY to cheap to pay for one. And that's why I feel so lucky to have won!) And now it has all sorts of fancy buttons and backgrounds and stuff. My blog is so high class. Now it totally thinks it's better than me. It doesn't matter. I will not be changing out of my flip-flops this summer just to impress my blog. Forget it BLOG. I'm still the boss of you.

But I have a question for you, Best Blog Readers in All the Land -
My old blog header had some pictures:


Should I add some new pictures to my new header (that match the color scheme) or do you like it simple and without pictures? I kind of like the extra splashes of color that pictures add, but I'd love to hear your thoughts!


2. Homemade Magic Shell

I think I might have had the real Magic Shell ice cream topping only once or twice when I was growing up. At a friend's house. And because we never had it in our house, I always thought it was extra delicious and fantastical. Isn't that always the way it goes?

When I had my own kids I really wanted them to enjoy the fantasticalness of Magic Shell. But that's before I saw how much it costs. One bottle, sure, I can afford that. But that's just like a free sample from a drug dealer. Then they're hooked and I'm at the grocery store 3 and 4 times a week going broke getting them their Magic Shell fix.

Sucks to be you, kids. Enjoy your Magic-Shell-free childhoods.

But then I saw this and our lives changed forever. It's so easy!

Two ingredients:

Coconut Oil (Did you know it has all sorts of health benefits? Check it out here!)


 Chocolate Chips

Measure out 1/2 cup coconut oil (in solid form) and 1 1/4 cups chocolate chips.


Microwave until the chocolate chips are just starting to melt (about a minute). Stir it all up until it's nice and smooth and melted.


Pour over ice cream.  


Wait for it to turn that magical waxy shade of hardened chocolate. 
This was my kids' favorite part: "It's changing! It's changing! It's changing!"

And then they cracked into it with their spoons and were so amazed! 

Add another mental point to my Coolest Mom Chart. 

It's a mental point because it's a made up chart that doesn't exist. 

*note to self: make a Coolest Mom Chart. Like a Potty Chart, or, say, a No Whining Chart, but for all the cool things I do for my kids. And then whenever my kids whine about something ridiculous I will simply direct them to the charts. And then they will know for sure that I win because I will have more stickers on my Cool Mom Chart than they have on the NO FREAKIN' WHINING CHART.

ANYWAY! What were we talking about? Homemade Magic Shell! It tastes just like the real thing! But if you want, you can go check out the ingredients for the real Magic Shell here. See! Almost exactly the same!


You can store your Magic Shell in a microwave safe container. I refrigerate mine, but I don't think it's necessary - the Smuckers site says you don't need to refrigerate the real Magic Shell.

And then whenever you are in need of some chocolate fantasticalness, just microwave it until it turns into its liquid state (I'm soooo scientific), pour it over ice cream, and crackle away!


3. Possibly the Coolest Kitchen Gadget EVER.


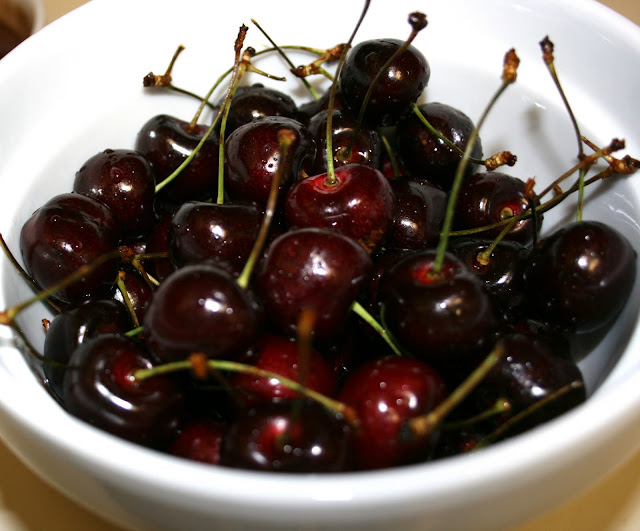
I love cherries. Do you? And how do you do you feel about the whole eat-the-cherry-and-then-spit-out-the-pit-nonsense? Not the best thing, but you have to deal, right?


That's what I thought. Until my sweet cousin, Rachel, bought me this:


That's right! It's a QuickPit. It's so fun to use! You stick the cherry in, pull the trigger, and BAM! Out pops the pit! 


See that hole? Yep, it's where the pit used to be until I BLASTED THAT SUCKER RIGHT OUT! 


Watch the how-to video here. Notice how she does it all calmly and slowly. And then picture me doing the same thing with some gusto. Dang! I aim my cherry gun at a white bowl and shout BAM! BAM! BAM! as I shoot those cherry pits out! And then I get to make myself a beautifully pristine bowl of pitless cherries. Now THAT is some fun delicious snacking!

Awesomeness. What's your favorite fun kitchen gadget?


LinkWithin

Related Posts Plugin for WordPress, Blogger...